
Disclaimer: What Liberty Ate. This site provides food and drink content for informational purposes only.
Key Takeaways
- Measure your wrapping paper carefully to avoid waste and ensure the gift is fully covered.
- Use a flat, uncluttered workspace and keep essential supplies within easy reach.
- Create crisp folds and neat corners by keeping the paper snug against the package.
- Choose wrapping techniques based on the shape and size of the gift.
- Add simple finishing touches such as ribbons, tags, twine, or natural decorations to personalise the presentation.
- Avoid common mistakes like using too much paper, excessive tape, or leaving loose folds.
- Consider reusable and sustainable materials such as fabric, gift bags, recycled paper, and saved ribbons.
Giving a beautifully wrapped present can make an ordinary gift feel much more thoughtful. The wrapping itself creates anticipation, adds personality, and shows that you took time to prepare something special. However, getting crisp corners, smooth paper, and neatly tied ribbons can seem surprisingly difficult, especially when you are working with an awkwardly shaped package or limited supplies.
Fortunately, gift wrapping does not require professional-level skills. With the right materials, measurements, and a few simple techniques, almost anyone can achieve a polished result. Whether you are preparing a birthday present, holiday package, wedding gift, or simple surprise, these practical tips can make wrapping easier, faster, and more enjoyable.
What Do You Need Before You Start?
Before learning how to wrap a gift, it helps to gather everything you will need and prepare your workspace. Many wrapping mistakes happen because people begin cutting paper before checking the size of the package or start folding without having scissors, tape, and ribbon nearby. A few minutes of preparation can make the entire process smoother and prevent unnecessary waste. You do not need an elaborate collection of craft supplies, either. Basic materials are enough for a neat presentation, while optional decorations can help you create a more distinctive finish. Set everything within easy reach before you begin so you can concentrate on making clean folds and sharp edges.
Essential Supplies
For most gifts, keep these items nearby:
- Wrapping paper: Choose paper that is sturdy enough to fold without tearing but flexible enough to create clean corners.
- Scissors: Sharp scissors make straighter cuts and reduce the chance of jagged edges.
- Clear tape: Double-sided tape can create a cleaner appearance because it hides the adhesive.
- Ribbon or twine: These finishing touches can make even simple wrapping look more polished.
- Gift tag: A tag identifies the recipient and provides space for a short personal message.
- Ruler or measuring tape: This is useful when you want precise cuts and consistent folds.
- Pencil: A light pencil mark can help you identify where to cut without leaving obvious marks.
How Should You Prepare Your Workspace?
A flat, clean surface is ideal for wrapping presents. A dining table, desk, or large countertop gives you enough room to spread out the paper and position the gift without constantly moving other objects.
If possible, remove clutter before beginning. Small items such as tape dispensers, pens, and decorations can get in the way when you are trying to make precise folds. Good lighting is also helpful because it allows you to see creases and edges more clearly.
For particularly delicate wrapping paper, place a smooth cutting mat or clean piece of cardboard underneath it. This protects the surface while giving you enough room to cut safely.
How Do You Measure the Wrapping Paper Correctly?
Measuring the paper is one of the most important steps because too little paper can leave exposed sections, while too much creates bulky folds and unnecessary waste. The goal is to use enough paper to cover the entire gift with a small amount of overlap. Instead of estimating, take a moment to position the package on the paper and check how much coverage you need. This simple habit can dramatically improve the final result. It also makes wrapping more efficient because you avoid repeatedly cutting new pieces of paper after discovering that your first piece is too small. Accurate measuring is especially important when using patterned or expensive wrapping paper.
How Much Paper Should You Cut?
Place the gift box upside down on the wrapping paper so the bottom of the package faces upward. Bring the paper around the package to determine whether the two long sides can meet comfortably in the middle.
The paper should overlap slightly when the edges meet. About an inch or two of overlap is generally enough to secure the package without creating a bulky seam.
For the ends, allow enough paper to cover roughly half to two-thirds of the height of the box when folded inward. If the paper extends dramatically beyond the ends, trim it before folding.
A useful rule is to avoid both extremes. The paper should not be so short that you struggle to cover the box, but it should not extend several inches beyond the package either.
What Is the Best Way to Cut Straight Lines?
Lay the wrapping paper flat and use the edge of the package, a ruler, or a straight surface as a guide. Make one confident cut instead of repeatedly snipping at the paper.
If your paper has a grid or repeating pattern printed on the back, use those lines to guide your scissors. This can make cutting considerably easier.
Do not worry if the cut is not perfectly precise at first. The folds and seams can hide small imperfections, particularly when you use ribbon or decorative elements.
How Do You Wrap a Standard Gift Box Step by Step?
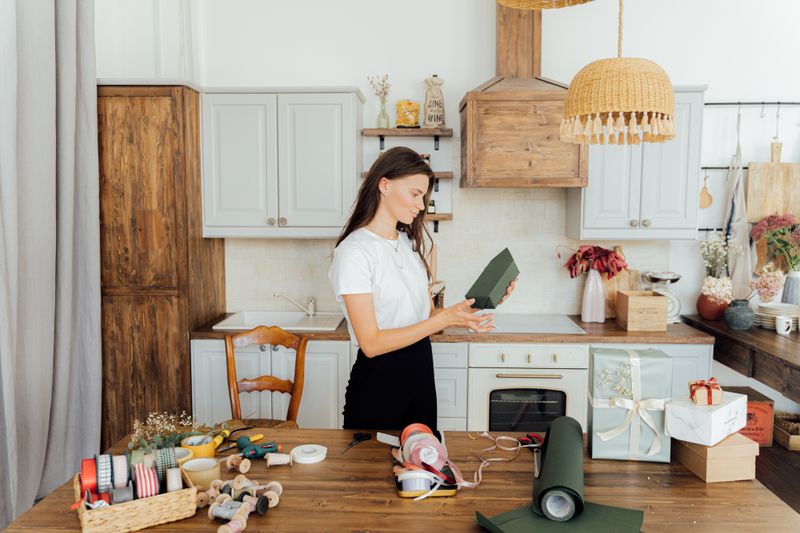
Once the paper is measured and cut, the actual wrapping process becomes much easier. A standard rectangular or square box is the best place to begin because its straight edges provide natural guides for folding. The key is to work methodically instead of rushing through the process. Keep the paper taut without pulling so hard that it tears or bends the box. Each fold should be intentional, and you should check the alignment before securing it with tape. With practice, these movements become almost automatic. The same basic technique can be adapted to many types of packages, making it one of the most useful skills for anyone who regularly prepares gifts.
Step 1: Position the Gift
Place the box upside down in the centre of the wrapping paper. This ensures that the main seam will eventually sit underneath the gift instead of being visible on top.
Leave enough paper on each side to cover the box completely. Adjust the position before making any permanent folds.
Step 2: Bring the Long Edges Together
Pull one long edge of the paper over the box and secure it with a small piece of tape. Then bring the opposite edge across it.
For a cleaner appearance, fold the edge of the second piece inward slightly before taping it. This creates a straight finished edge rather than leaving a raw cut visible.
Keep the paper snug against the box while you work. Loose paper can create wrinkles and make the finished package look less polished.
Step 3: Fold the First End
Turn your attention to one open end of the box. Push the paper inward along the sides of the box so that two triangular flaps form naturally.
Press the upper and lower folds flat against the package. You should now have a flap pointing toward the centre of the box.
Fold the bottom flap upward and secure it with tape. Repeat the process on the other end.
Step 4: Finish the Second End
Repeat the same folding technique on the opposite end. Try to keep the folds symmetrical so both ends have a similar appearance.
Once everything is secured, run your fingers along the edges to reinforce the creases. Sharp folds help transform ordinary wrapping paper into a neat, structured package.
Step 5: Check the Finished Package
Turn the gift over and inspect all sides. Look for loose paper, exposed cardboard, uneven seams, or excessive tape.
If something looks slightly uneven, fix it before adding decorations. It is much easier to adjust the paper before the ribbon is attached.
How Can You Make Corners Look Neater?
Corners are often the detail that separates basic wrapping from professional-looking wrapping. Even when the paper is correctly measured, loose corners can make a package appear bulky or unfinished. Fortunately, creating clean corners is mostly about controlling how much paper you fold inward. Press each crease firmly and keep the paper close to the box as you work. Avoid folding large amounts of excess paper into the corners because this creates unnecessary thickness. Instead, aim for compact, deliberate folds that follow the shape of the package. Once you understand the basic technique, you can use it on boxes of different sizes and create consistently neat results.
Keep the Paper Tight
As you fold each corner, gently pull the paper toward the box. This removes slack and gives you a defined crease.
Do not pull excessively, however. Thin paper can tear, particularly at the corners where several layers overlap.
Create Sharp Creases
Use your fingertips to press along each edge. For a particularly crisp finish, you can run a ruler carefully along the fold.
Avoid using excessive pressure on delicate wrapping paper because it can leave visible marks or cause the surface to split.
Reduce Excess Paper
If you notice a large amount of paper gathering at one corner, the problem may have started when you measured the paper. Trim some excess before completing the fold if necessary.
A little extra material is useful, but large folds make corners look rounded rather than crisp.
What Can You Do With an Odd-Shaped Gift?
Not every present comes in a convenient rectangular box. Toys, kitchen equipment, clothing, bottles, sporting goods, and unusual decorative objects can all create wrapping challenges. Instead of struggling to force a traditional technique onto an awkward package, choose a method that works with the item’s shape. Sometimes the easiest solution is to put the gift inside a box or container first. In other situations, a gift bag, fabric wrapping, or creatively folded paper may produce a better result. The objective is not to follow one strict technique but to create a secure and attractive presentation that suits the shape of the item.
Should You Use a Box?
When possible, placing an irregularly shaped item inside a box is one of the easiest solutions. A box provides straight edges that make conventional wrapping much simpler.
Fill empty spaces with tissue paper or another lightweight material so the gift does not move around. The result will be easier to wrap and more secure during transport.
What About Soft Gifts?
Clothing, scarves, blankets, and plush items can often be wrapped directly, but they may be difficult to shape neatly.
One option is to fold the item into a compact rectangle and wrap it as you would a box. Another is to place it in a decorative bag and finish the presentation with tissue paper and ribbon.
How Should You Wrap Cylindrical Gifts?
For bottles, candles, and other cylindrical objects, consider using a sheet of paper large enough to wrap around the item with some overlap.
Twist or fold the paper at both ends and secure it with ribbon. This creates a simple candy-like presentation that works particularly well for small cylindrical gifts.
How Can You Wrap a Gift Without Making It Look Ordinary?
A beautifully wrapped present does not necessarily require expensive paper or elaborate decorations. In many cases, thoughtful details have a greater visual impact than expensive materials. Consider the recipient, the occasion, and the overall mood you want the package to convey. A minimalist presentation might use plain paper and natural twine, while a festive gift could feature layered ribbons and decorative tags. You can also make the wrapping part of the gift itself by incorporating reusable materials or small accessories. The important thing is to create a presentation that feels intentional rather than simply covering the package as quickly as possible.
Try Different Paper Styles
Plain kraft paper is versatile and can be dressed up with ribbon, twine, stamps, stickers, dried foliage, or handwritten messages.
Patterned paper can make a package feel festive immediately, while solid-colour paper provides a cleaner backdrop for more elaborate decorations.
Add a Personal Tag
A handwritten tag can make even simple wrapping feel more meaningful. Write the recipient’s name clearly and consider adding a short message.
For a more personal approach, use a small photograph, handmade card, or decorative label instead of a traditional gift tag.
Use Natural Decorations
Small natural details can add texture and visual interest. Depending on the occasion, consider attaching:
- A small sprig of greenery
- Dried flowers
- A cinnamon stick
- A pine cone
- A simple wooden ornament
- A paper cutout
- A small reusable decoration
Make sure any attached material is clean, dry, and secure enough to survive handling.
How Do You Choose the Right Finishing Touches?
The final decorations can change the entire appearance of a wrapped present, so it is worth considering how the individual elements work together. Ribbon, twine, bows, tags, stickers, and ornaments can all be attractive, but using too many at once can make the package appear crowded. Instead, select a few details that complement the wrapping paper. Think about the recipient as well. A child might enjoy bright colours and playful decorations, while an adult may prefer a simple and sophisticated presentation. When deciding between different ways to choose a gift, remember that presentation can reinforce the thought behind the present without overwhelming the actual gift.
How Should You Use Ribbon?
Ribbon can be tied around the package vertically, horizontally, or in a cross pattern. A traditional bow placed in the centre creates a classic look.
For a modern presentation, try wrapping twine around the package and adding a small tag. The simpler approach can be especially effective with textured paper.
Can You Make a Bow Yourself?
Absolutely. Cut a length of ribbon and create several loops before securing them at the centre. Adjust the loops until they appear balanced.
You can also make a simple layered bow by combining two complementary ribbons. Use one as the base and a narrower ribbon as the accent.
How Much Decoration Is Enough?
A useful principle is to choose one main decorative feature and one or two supporting details. For example, a patterned paper might only need a simple ribbon and tag.
If the paper is plain, you can afford to be more creative with the decorations. Let the overall package guide your choices rather than adding details simply because you have them available.
What Are Some Common Gift-Wrapping Mistakes to Avoid?
Even experienced gift wrappers occasionally encounter problems. Most mistakes are easy to prevent once you know what causes them. The most common issues involve using incorrectly sized paper, failing to create firm creases, relying on too much tape, or leaving the package loose inside the wrapping. Another frequent problem is trying to finish everything as quickly as possible. Rushing often leads to crooked seams and uneven corners. Taking a little extra time at the measuring and folding stages can save you considerable frustration later. If your wrapping does not look right, do not assume you need better supplies. Often, a small adjustment to the technique is all that is necessary.
Using Too Much Paper
Excess paper creates thick folds and bulky corners. Measure the package first and trim away unnecessary material.
Using Too Much Tape
Tape should secure the wrapping, not dominate it. Use small pieces where necessary and consider double-sided tape for visible seams.
Wrapping a Dirty or Damaged Package
Make sure the gift box is clean and in good condition before wrapping it. If the original packaging is damaged, place the item in another box or container first.
Ignoring the Pattern
If your paper has stripes, grids, or repeating designs, pay attention to how the pattern lines up. A little planning can make the finished package look significantly more professional.
Forgetting the Recipient’s Name
When wrapping several gifts at once, it is easy to lose track of which package belongs to whom. Add tags as you finish each present rather than waiting until everything is wrapped.
How Can You Wrap Gifts Faster?
Gift wrapping can become time-consuming when you have many presents to prepare. The solution is not necessarily to rush but to organize the process. Set up a dedicated wrapping station with all your supplies nearby and prepare several gifts at the same time. You can measure and cut multiple pieces of paper, then wrap the packages in sequence. Keeping commonly used materials together also prevents you from repeatedly stopping to search for scissors, tape, tags, or ribbon. With a little organization, even a large collection of gifts can be completed efficiently. The more frequently you wrap presents, the more natural the process will become.
Create a Wrapping Station
Keep your paper, scissors, tape, ribbons, tags, and decorations together. A shallow storage container can hold small supplies while a larger roll organizer can keep wrapping paper accessible.
Measure Multiple Packages Together
If you have several gifts of similar sizes, measure them one after another and cut their paper in batches. This is faster than switching repeatedly between measuring and wrapping.
Use Simple Techniques
Not every package needs an elaborate design. Save detailed decorations for special gifts and use straightforward wrapping for packages that will already have plenty of visual interest.
Keep Extra Supplies Ready
Running out of tape or ribbon in the middle of a wrapping session can slow everything down. Keep spare supplies within reach, especially during holidays or other occasions when you are preparing many gifts.
Can You Make Gift Wrapping More Sustainable?
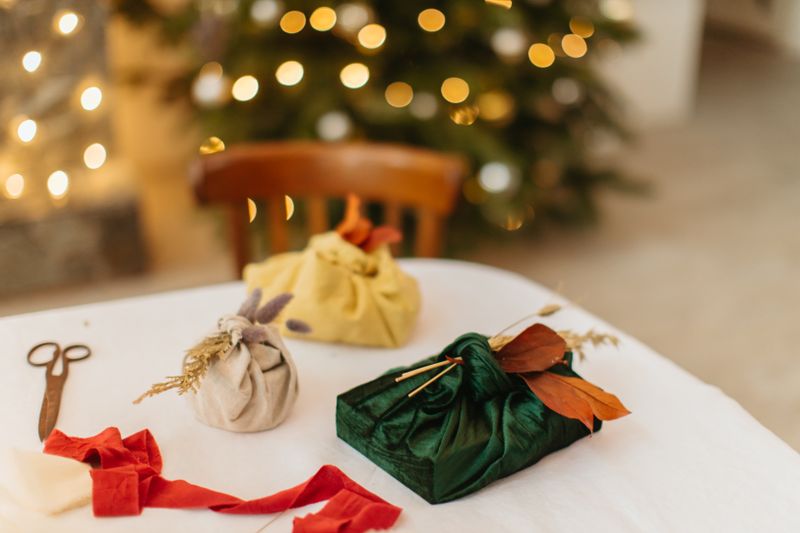
Gift wrapping can create a significant amount of waste, particularly when paper is torn off and discarded after a single use. Fortunately, there are several ways to reduce waste without sacrificing presentation. Reusable bags, fabric wrapping, recycled paper, and repurposed materials can all create attractive packages. Even when you use traditional wrapping paper, careful measuring can reduce scraps. Consider saving ribbons, bows, boxes, and gift bags that are still in good condition for future occasions. Sustainable wrapping is not about making every package perfectly waste-free. It is about finding practical ways to reuse materials and make thoughtful choices whenever possible.
Reuse Gift Bags and Ribbon
If a gift bag remains clean and undamaged after an occasion, flatten it and store it for later. Ribbon can also be untied carefully and reused.
Consider Fabric Wrapping
Fabric squares, scarves, tea towels, or reusable cloth bags can serve as attractive alternatives to disposable wrapping paper. They can also become part of the present.
Reuse Suitable Paper
Large pieces of paper that survive gift opening can sometimes be used for smaller packages. Smooth them carefully and store them flat.
Save Cardboard Boxes
Sturdy boxes can be useful for future gifts. Cover old shipping boxes with attractive paper rather than purchasing a new box for every occasion.
How Can You Make Gift Wrapping Easier for Beginners?
If you are new to gift wrapping, do not try to master every technique immediately. Start with a standard rectangular box and focus on the fundamentals: accurate measuring, straight cutting, tight folds, and minimal visible tape. Once you are comfortable with those steps, experiment with ribbons, decorative tags, unusual paper, and irregular shapes. It can also help to practise with inexpensive paper before working with premium materials. Remember that minor imperfections are normal, especially when you are learning. A gift does not need to look as though it came from a professional wrapping counter to feel thoughtful. The care behind the presentation matters just as much as the finished appearance.
Start With Simple Shapes
Rectangular boxes provide the easiest introduction because their edges make it clear where each fold should go.
Practise Before Special Occasions
If you have an important gift to prepare, try wrapping a spare box first. This gives you an opportunity to test the paper and technique without pressure.
Do Not Aim for Perfection
Small wrinkles or slightly uneven folds are unlikely to matter to the person receiving the present. Focus on creating a secure, attractive package rather than an absolutely flawless one.
Learn One Technique at a Time
Master the standard box first. Then experiment with odd-shaped gifts, creative decorations, reusable wrapping, and more advanced folds.
What Are the Best Last-Minute Wrapping Tricks?
Sometimes you remember a gift at the last minute or realize that you need to prepare several packages just before an event. In these situations, simplicity is your friend. Look around your home for clean materials that can create an attractive presentation without requiring a trip to the store. A plain box, kraft paper, newspaper-style paper, fabric, or even a clean reusable bag can become the foundation of a present. Add one strong decorative element, such as ribbon or a handwritten tag, rather than attempting an elaborate design. The goal is to make the package look intentional and presentable while saving time and avoiding unnecessary stress.
Use a Gift Bag
A gift bag is one of the fastest options for an irregularly shaped item. Add tissue paper and a tag, then arrange the tissue so it partially covers the top of the bag.
Choose a Simple Paper Wrap
If time is limited, use plain wrapping paper and a single ribbon. A clean, well-folded package often looks better than an elaborate design that was rushed.
Repurpose Clean Household Materials
Brown paper, fabric, paper bags, and suitable boxes can all become useful wrapping materials. Add a handwritten label to give the package a deliberate and personal finish.
Keep Emergency Supplies
If you frequently give gifts, maintain a small backup supply of wrapping paper, tape, ribbon, and tags. Having these basics available can save considerable time when an unexpected occasion arises.
How Can You Make Every Wrapped Gift Look More Thoughtful?
Good gift wrapping is ultimately about more than technique. The best presentation reflects some consideration for the person receiving the gift. You might select paper in a colour they enjoy, attach a decoration connected to their interests, or write a short message that references a shared memory. These details do not have to be expensive or complicated. In fact, simple choices can often feel more personal than elaborate decorations. Pay attention to the occasion, the recipient, and the gift itself. When those elements work together, the wrapping becomes part of the experience rather than simply a covering that will be removed moments later.
Match the Wrapping to the Occasion
Use colours and decorations appropriate for the event. Elegant paper may suit a wedding, playful designs may work for children’s birthdays, and seasonal patterns can add atmosphere to holiday presents.
Consider the Recipient
Think about the person’s interests, favourite colours, or personal style. A small detail that reflects their personality can make the package feel deliberately prepared for them.
Add a Personal Message
A handwritten note can be more memorable than expensive decoration. Even a brief message can make the gift feel warmer and more meaningful.
Make Presentation Part of the Experience
Consider how the recipient will first encounter the package. A neat bow, attractive tag, or carefully chosen decoration can build anticipation before the gift is even opened.
What Should You Remember When Wrapping Your Next Gift?
Learning how to wrap a gift does not require expensive equipment, complicated techniques, or professional experience. The fundamentals are simple: measure the paper carefully, cut it cleanly, keep the wrapping snug, create firm creases, and use just enough tape to secure everything. From there, you can experiment with ribbons, tags, sustainable materials, unusual shapes, and personal decorations. The most important improvement often comes from slowing down during the first few steps rather than trying to rush toward the finished package. With regular practice, wrapping becomes quicker and more natural. A thoughtfully wrapped gift can create excitement before the present is opened and show the recipient that you put genuine care into the entire experience.
Whether you are preparing one special present or a whole collection of gifts, focus on making each package neat, secure, and appropriate for the person receiving it. Perfect wrapping is not the goal. A presentation that feels personal and thoughtfully prepared is what makes a gift memorable.